Why do you have trouble concealing that vibrant red face paint for your next costume or event? We’ve all been there, wondering which primer color will magically hide the hues? In this article, we’ll show you how to choose the ideal primer for red face paint, so you don’t have to be afraid to ask.
The first step in concealing red face paint is to become acquainted with color theory and choose a primer color that complements and neutralizes the red tones. However, there is much more than meets the eye. We’ll take you through the nuances so that you can put your makeup game to the test, providing you with expert tips, real-life examples, and troubleshooting solutions.
As the journey continues, you will be transformed into a professional and will have the confidence to tackle those crimson shades without fear. This article will assist you in selecting the right primer color for red face paint, whether you are a makeup artist, cosplayer, or simply looking to achieve flawless coverage.
Understanding the Basics of Primer

In the realm of painting, understanding the basics of primer is akin to laying a solid foundation for a masterpiece. Primer, often the unsung hero of the painting process, plays a pivotal role in achieving that flawless, enduring finish we all desire. So, let’s delve into the intricacies of this essential component, exploring what primer is, its diverse types in the market, and the critical art of choosing the right one for the job.
What is Primer and Its Role in Painting?
At its core, primer is the preparatory layer that bridges the gap between your canvas (or surface) and the vibrant colors of your paint. It’s the unsung hero that acts as a buffer, ensuring your colors adhere and shine in all their glory. Think of it as the trusty foundation garment that smooths out imperfections, creating a flawless canvas for your artistic vision to come to life.
Discussing the Different Types of Primers
The world of primers is a tapestry woven with various types, each tailored to specific needs and surfaces. As painters, understanding these nuances can make all the difference in the final result.
Acrylic Primer: This versatile primer is a crowd favorite. It’s suitable for a wide range of surfaces, from canvas to wood to paper. With quick drying times and easy cleanup, it’s a go-to choice for many artists.
Oil-Based Primer: If you’re working with oil paints, this primer is your trusted companion. It creates a strong bond with oil paints, allowing for a rich, vibrant finish. However, it comes with a longer drying time and requires solvents for cleanup.
Watercolor Ground: Tailored specifically for watercolors, this primer helps prevent the paper from absorbing too much paint, allowing for better control and vibrant colors.
Gesso: A true classic, gesso is a white primer that’s often used to prepare canvases. It provides a toothy surface for paint adhesion and can be used with both acrylic and oil paints.
Specialty Primers: Depending on your artistic vision, you may encounter specialty primers, such as those designed for metallic or textured finishes. These cater to unique needs and can elevate your artwork.
Emphasizing the Importance of Selecting the Right Primer
Now, here’s the crux of the matter – selecting the right primer. It’s not merely a matter of choosing one at random. The primer you pick should align seamlessly with your project’s requirements. Here’s why:
Adhesion: Different surfaces demand different primers for optimal adhesion. Choosing the wrong one can result in peeling, flaking, or a lackluster finish.
Texture: Some primers offer a smoother surface, while others provide a more textured one. Your choice here can affect the overall look and feel of your artwork.
Transparency: Primers can vary in their level of transparency. This influences how your base layer interacts with the colors you apply, making it a crucial consideration for achieving your desired effects.
Drying Time: Time is of the essence in the world of art. Some primers dry quickly, allowing you to dive into your painting sooner, while others require more patience.
Compatibility with Paints: Certain primers work better with specific types of paints. Mixing and matching haphazardly can lead to unintended results.
In essence, the primer you choose sets the stage for your artistic journey. It’s the first brushstroke, the initial layer of your masterpiece. So, take the time to understand your surface, your paint, and your artistic vision. Selecting the right primer is not just a choice; it’s a declaration of your commitment to your craft.
The Challenge of Covering Red Face Paint
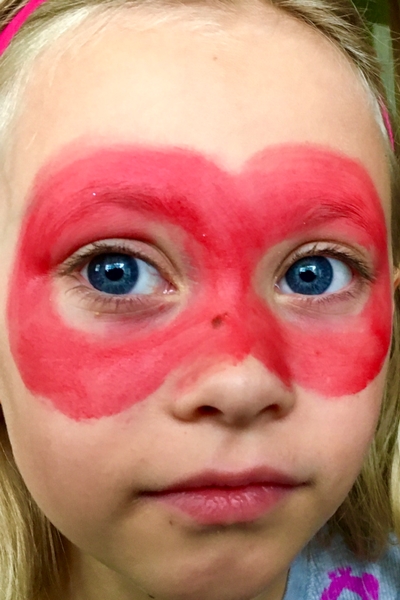
When it comes to the world of face painting, there’s a peculiar challenge that artists and enthusiasts often encounter: covering red face paint. It might sound like a straightforward task, but in reality, it’s a unique conundrum that demands a deep dive into the complexities of color theory and makeup artistry. Let’s unravel the intricacies of why red face paint can be so notoriously tricky to conceal, exploring how the intensity and type of red play pivotal roles and shedding light on the common issues faced by those attempting to achieve a flawless finish.
The Enigma of Covering Red Face Paint
Why is covering red face paint akin to unlocking a mysterious puzzle? Well, for starters, red is a color that boasts an unparalleled intensity. It has the uncanny ability to assert its dominance, often shining through even the most well-intentioned layers of makeup. The vibrant nature of red can make it challenging to neutralize, as it stubbornly resists being subdued.
Intensity and Types of Red Matter
Now, let’s delve deeper into the nuances of intensity and types of red. It’s not a one-size-fits-all scenario; there’s a spectrum of red shades, each with its own set of challenges. Here are some key factors to consider:
Scarlet vs. Crimson: Scarlet, with its bright, fiery tones, can be particularly demanding to cover. On the other hand, crimson, with its deeper, velvety hue, might be slightly more forgiving.
Intense vs. Muted: The intensity of the red face paint matters significantly. Highly pigmented reds will naturally pose a greater challenge, as they tend to overpower other colors.
Matte vs. Metallic: The finish of the red paint also comes into play. Matte reds are generally easier to work with, while metallic or shimmering reds can add an extra layer of complexity due to their reflective properties.
Consistency: The texture and consistency of the red paint matter. Thick, heavy paints may require more effort to cover compared to lighter, more fluid formulations.
Common Issues in the Battle Against Red
As artists and makeup enthusiasts strive to conceal red face paint effectively, they often encounter a range of common issues:
Color Bleeding: Red face paint has a tendency to bleed into other colors, creating a messy, uneven appearance that’s far from desirable.
Staining: The intensity of red can result in staining the skin, making it challenging to remove the traces of red even after repeated cleansing.
Patchiness: Achieving a uniform, flawless coverage can be elusive, with patches of red stubbornly peeking through.
Allergic Reactions: Some individuals may experience skin sensitivity or allergies when using red face paint, adding an extra layer of complexity to the process.
In essence, the challenge of covering red face paint is a multi-faceted one, where the interplay of color intensity, type, and consistency requires a nuanced approach. It’s a battle where makeup artists and enthusiasts employ their skills and techniques to triumph over the vibrant dominance of red. Yet, it’s also a testament to the artistry and creativity that can emerge from such challenges, pushing the boundaries of what’s possible in the world of makeup.
Matching Primer Colors to Cover Red Face Paint
In the realm of makeup artistry, mastering the art of matching primer colors to effectively cover red face paint is a skill that can elevate your cosmetic prowess to new heights. It’s a fascinating journey into the world of color theory and makeup sorcery, where understanding the principles of complementary colors becomes your secret weapon. So, let’s delve into the intricacies of this transformative process, exploring how color theory works in painting, the magic of complementary colors, and practical examples of primer colors that excel at concealing red face paint.
The Magic of Color Theory in Painting
Color theory is the bedrock upon which artists, including makeup artists, build their craft. It’s the science and art of understanding how colors interact with each other and with the human eye. In the context of concealing red face paint, color theory offers a roadmap to success.
Primary Colors: At the heart of color theory are the primary colors: red, blue, and yellow. These colors cannot be created by mixing other colors and serve as the building blocks for all other hues.
Complementary Colors: Complementary colors are pairs of colors that, when combined, cancel each other out. For red, its complementary color is green. This means that using a green primer can help neutralize and cover the vibrant red tones of face paint effectively.
Color Wheel: The color wheel, a visual representation of color relationships, plays a crucial role in selecting the right primer color. By pinpointing the opposite color on the wheel, you can identify the complementary primer color to use.
The Power of Complementary Colors in Covering Red
Complementary colors, such as green and red, work together in a harmonious dance that conceals and neutralizes. When you apply a primer color that is the opposite of the face paint’s hue, these colors cancel each other out, creating a more neutral base for your makeup. This concept is the key to effectively covering red face paint.
Neutralization: Green primer counters the intensity of red, reducing its prominence on the skin. This is akin to an artist using a gray canvas to create subtle contrasts.
Balancing Act: Complementary colors bring balance to your makeup, ensuring that the red tones don’t overpower the other colors you apply on top. This results in a more even and natural-looking finish.
Versatility: While green is the direct complement of red and an excellent choice, you can also explore shades of blue, which are complementary to orange hues (which red leans towards). Blue primers can work effectively in certain cases, depending on the specific shade of red you’re dealing with.
Practical Examples of Primer Colors
Now, let’s dive into practical examples of primer colors that have proven their mettle in the quest to cover red face paint effectively:
Green Primer: This is the go-to choice for neutralizing intense red face paint. It’s a versatile option that can tackle a wide range of red shades, from bright scarlet to deep crimson.
Peach Primer: For those dealing with redness on the skin, a peach or salmon-colored primer can work wonders. It helps to correct the red undertones before applying additional makeup.
Lavender Primer: In some cases, where redness has a purplish or bluish undertone, a lavender primer can be effective. It counteracts those cool tones, creating a balanced base.
Yellow Primer: When working with warm reds or oranges, a yellow primer can help in neutralization. It’s particularly useful for achieving a harmonious look when red face paint leans towards the warmer end of the spectrum.
In essence, the art of matching primer colors to cover red face paint is a testament to the power of understanding color theory. It’s a symphony of hues, where complementary colors work in unison to create a flawless canvas for your artistic expression. So, as you embark on your makeup journey, armed with the knowledge of color theory, remember that the primer you choose can make all the difference in transforming red face paint into a masterpiece of beauty.
Testing and Swatching
In the realm of makeup artistry, the journey to achieving flawless coverage begins with a crucial step: testing and swatching your chosen primer colors. It’s a meticulous process that can make all the difference between makeup that dazzles and makeup that falls short of expectations. Let’s delve into the significance of testing primer colors before application, provide a step-by-step guide on how to create swatches, and share invaluable tips for evaluating the effectiveness of different primer colors.
The Importance of Testing Primer Colors
Before you embark on your makeup journey, testing primer colors is a non-negotiable step. It’s a proactive approach that can save you time, frustration, and the dreaded makeup mishaps later on. Here’s why it’s vital:
Color Accuracy: What you see in the primer tube or palette may not always translate accurately onto your skin. Factors like your skin’s undertone and the lighting in which you apply makeup can affect how the color appears. Testing ensures a match.
Allergic Reactions: Everyone’s skin is unique, and what works for one may not work for another. Testing allows you to check for any allergic reactions or sensitivities to the primer.
Compatibility: Primer isn’t just about color; it’s about texture and formula too. By testing, you can ensure that the primer not only matches your skin tone but also works well with your chosen foundation and other makeup products.
Creating Swatches: A Step-by-Step Guide
Now, let’s walk through the process of creating swatches—a practical method for assessing how different primer colors perform on your skin:
Gather Your Supplies: You’ll need the primer colors you want to test, a clean makeup brush or sponge, and a small section of your inner forearm.
Prep Your Skin: Ensure your forearm is clean and free from any residual makeup or lotions. This provides a clean canvas for testing.
Apply the Primers: Take a small amount of each primer color and apply it side by side on your forearm. Use a brush or sponge to create a smooth, even application.
Observe in Different Lighting: Move your forearm under various lighting conditions—natural light, indoor lighting, and even dim lighting if applicable. This step helps you see how the primer color appears in different environments.
Wait and Assess: Allow the primers to dry for a few minutes. This gives you a more accurate representation of how they’ll appear once fully set.
Compare and Contrast: Examine the primer colors side by side. Pay attention to how well they blend into your skin, whether they neutralize redness effectively, and if they match your overall complexion.
Tips for Evaluating Primer Colors
As you assess the swatches you’ve created, keep these valuable tips in mind:
Undertone Matching: Consider your skin’s undertone when selecting a primer color. If you have warm undertones, opt for a primer with warm undertones as well, and vice versa for cool undertones.
Texture and Finish: Assess how the primer feels on your skin and the finish it provides. Some primers offer a matte finish, while others provide a subtle glow. Choose the one that aligns with your desired makeup look.
Longevity: A good primer should help your makeup last longer. Observe how well the primers hold up throughout the day to determine their effectiveness.
All-Day Comfort: Pay attention to any discomfort or irritation. If a primer feels heavy or causes skin issues, it may not be the right fit for you.
Tips for Application

Achieving impeccable makeup that endures the day begins with mastering the art of applying primer. To attain that flawless finish, it’s essential to follow a set of guidelines that encompass prepping your skin, applying the primer effectively, and integrating additional products or techniques to enhance coverage. Here, we offer you a comprehensive guide to elevate your makeup game to the next level.
Guidelines for Preparing Your Skin
Before you even think about applying primer, the canvas – in this case, your skin – needs to be primed as well. Follow these guidelines to ensure your skin is in the best possible condition:
Cleansing: Start with a clean slate. Use a gentle cleanser to remove any dirt, oil, or residual makeup. This provides a smooth surface for the primer to adhere to.
Exfoliation: Exfoliation is key to sloughing off dead skin cells and creating a smooth texture. Opt for a mild exfoliant that suits your skin type, and use it sparingly to avoid over-exfoliation.
Moisturizing: Hydration is the foundation of healthy skin. Apply a suitable moisturizer to keep your skin supple. Allow it to fully absorb before moving on to primer application.
Proper Application Technique for Primer
Once your skin is prepped, it’s time to apply the primer. The technique you use can significantly impact the final result. Here’s how to do it right:
Dispense Sparingly: Less is more when it comes to primer. Start with a small amount, typically a pea-sized drop, and apply it evenly to your face. Focus on areas where you want makeup to stay put, like the T-zone.
Use Fingertips or Tools: You can apply primer using your fingertips for a more natural finish, or opt for a makeup sponge or brush for precision. The choice depends on your preferred method.
Blend Thoroughly: Blend the primer into your skin using gentle, upward motions. Ensure there are no streaks or uneven patches.
Allow Setting Time: Give the primer a few minutes to set before moving on to foundation or other makeup products. This step allows it to create a solid base.
Enhancing Coverage with Additional Products and Techniques
If you’re aiming for ultimate coverage and longevity, consider integrating these additional products or techniques into your makeup routine:
Color Correction: If you’re dealing with specific skin concerns, such as redness or dark spots, you can incorporate color-correcting products before applying primer. For example, green correctors neutralize redness, while peach or orange correctors address dark spots.
Layering: In cases where you need extra coverage, such as for a special event or photography, you can layer primers. Start with a color-correcting primer to address specific issues and follow up with your regular primer for a flawless finish.
Setting Spray: To lock in your makeup and keep it looking fresh throughout the day, consider using a setting spray after completing your makeup routine. This adds an extra layer of protection against smudging or fading.
Blotting Papers: To combat excess oil and shine during the day, keep blotting papers on hand. These handy sheets help absorb oil without disturbing your makeup.
Case Studies and Examples
Real-life examples can often illuminate the transformative power of makeup primer, especially when it comes to the challenge of covering red face paint. Here, we delve into compelling case studies and present before-and-after photos to showcase the remarkable difference primer can make in achieving a flawless complexion.
Case Study 1: The Scarlet Dilemma
Meet Sarah, a makeup enthusiast with a penchant for experimenting with bold and vibrant makeup looks. Recently, she decided to create a striking scarlet-themed makeup for a special event. However, what she didn’t anticipate was the intensity of the red face paint she chose. It proved to be a formidable adversary, dominating her complexion and refusing to blend seamlessly with other colors. Frustration set in as she struggled to attain the desired look.
The Primer Intervention
Sarah, determined to salvage her makeup masterpiece, turned to primer as her savior. She selected a green primer, knowing its complementary properties could counteract the relentless scarlet hue. Applying it diligently before her foundation, she witnessed an astonishing transformation.
The Before-and-After
Before Primer: Sarah’s face was engulfed in a fiery sea of red, with uneven patches and color bleeding into surrounding areas. Her makeup lacked the balance and subtlety she aimed for.
After Primer: The green primer worked its magic, neutralizing the scarlet intensity and creating a smooth, neutral canvas. When she applied her makeup atop the primed skin, the colors blended seamlessly, resulting in a flawless finish.
Case Study 2: The Rosy Predicament
Now, let’s meet Mark, who had a different red challenge to conquer. He had a natural rosy undertone to his skin, and this inherent redness often made it difficult to achieve a balanced complexion. Despite his best efforts, his makeup tended to look uneven, and the rosy undertone persisted.
The Primer Solution
Mark, determined to achieve a more even and neutral look, decided to experiment with makeup primer. He chose a peach primer, ideal for addressing rosy undertones and creating a more neutral base.
The Before-and-After
Before Primer: Mark’s skin had a noticeable rosy undertone, making his makeup appear patchy and uneven. Achieving a balanced complexion was a persistent challenge.
After Primer: The peach primer successfully neutralized the rosy undertone, providing a more even base for his makeup. When he applied foundation and other products, the difference was astonishing—his complexion looked balanced, and the rosy undertone was effectively subdued.
These real-life case studies underscore the transformative potential of makeup primer. From countering intense scarlet hues to neutralizing natural undertones, primer serves as a powerful tool in the quest for flawless coverage. These individuals, like many others, experienced firsthand the incredible difference primer can make, turning makeup challenges into makeup victories.
Troubleshooting
The path to achieving a flawless makeup look can be fraught with challenges, and the priming process is no exception. Common issues can arise, leaving individuals frustrated and seeking solutions. In this troubleshooting guide, we address some of the most prevalent problems encountered during the priming process and provide invaluable tips and solutions to help you overcome them.
Issue 1: Primer Pilling
The Challenge: Primer pilling occurs when the product balls up on the skin’s surface, creating an unsightly and uneven texture. This can disrupt the makeup application process.
Solution: To prevent primer pilling, follow these steps:
Skin Prep: Ensure your skin is properly cleansed, exfoliated, and moisturized before applying primer. Primer adheres best to a smooth, hydrated surface.
Allow Absorption: Give your moisturizer ample time to absorb into the skin before applying primer. Rushing this step can lead to pilling.
Primer Application: Apply primer sparingly and evenly, using gentle upward motions. Avoid excessive rubbing or layering, as this can contribute to pilling.
Issue 2: Uneven Texture
The Challenge: Some individuals may find that primer accentuates skin imperfections or creates an uneven texture, making makeup application challenging.
Solution: To achieve a smooth canvas, consider the following:
Choose the Right Primer: Select a primer with a texture that complements your skin type. For those with large pores, a pore-minimizing primer can work wonders.
Blending: Ensure thorough blending of the primer into your skin. Use a makeup sponge or brush to achieve an even application.
Wait Time: Allow the primer to set for a few minutes before applying foundation. This gives it time to create a seamless base.
Issue 3: Excessive Dryness or Oiliness
The Challenge: Primer can sometimes exacerbate skin dryness or oiliness, leading to an unbalanced complexion.
Solution: Achieving the right balance is key:
Hydration: If you have dry skin, opt for a hydrating primer to lock in moisture. For oily skin, look for mattifying primers that control excess oil.
Layering: Consider using a hydrating or mattifying moisturizer, depending on your skin type, before applying primer. This helps maintain the skin’s natural balance.
Issue 4: Primer Allergies or Sensitivities
The Challenge: Some individuals may experience skin irritations or allergies in response to certain primer ingredients.
Solution: To avoid adverse reactions:
Patch Test: Before applying a new primer to your entire face, perform a patch test on a small area of your skin. This helps identify any potential allergies or sensitivities.
Hypoallergenic Options: Seek out hypoallergenic or dermatologist-tested primers, especially if you have sensitive skin.
Issue 5: Makeup Slipping or Fading
The Challenge: Primer is intended to enhance makeup longevity, but sometimes makeup still slips or fades prematurely.
Solution: Ensure your makeup lasts all day:
Setting Spray: Finish your makeup routine with a setting spray to lock in your look and prevent smudging or fading.
Touch-Ups: Carry blotting papers and a compact mirror for quick touch-ups throughout the day, especially in high-traffic areas like the T-zone.
Removing Primer and Face Paint
The process of applying primer and face paint is a creative and artistic endeavor that can yield stunning results. However, at the end of the day or event, it’s equally important to know how to safely and effectively remove these products to maintain the health and integrity of your skin. In this guide, we’ll walk you through the steps to ensure a gentle and thorough removal process and offer recommendations for post-paint skincare.
Safely Removing Primer and Face Paint
Gentle Cleanser: Begin by selecting a gentle, non-comedogenic cleanser that suits your skin type. Apply it to your face and neck, and gently massage in circular motions. This step helps break down the makeup, including primer and face paint.
Warm Water: Use lukewarm water to rinse your face thoroughly. Avoid hot water, as it can strip your skin of natural oils.
Micellar Water: For stubborn areas or waterproof makeup, micellar water can be a game-changer. Apply it to a cotton pad and gently swipe across your face, focusing on areas with heavy makeup.
Double Cleansing: If you wear multiple layers of makeup or face paint, consider double cleansing. After using micellar water, follow up with your gentle cleanser again to ensure all residues are removed.
Eye Makeup Remover: If you’ve applied eye makeup, use a specialized eye makeup remover to dissolve mascara and eyeliner. Apply it to a cotton pad and gently press it against closed eyelids for a few seconds before wiping away.
Avoid Harsh Scrubbing: Resist the temptation to scrub vigorously, as this can irritate the skin. Instead, use soft, circular motions and be patient.
Skincare After Paint Removal
Toning: After cleansing, use a gentle toner to balance the skin’s pH levels. Look for alcohol-free options to prevent drying out your skin.
Moisturizing: Apply a hydrating moisturizer to replenish the moisture lost during makeup removal. Choose a product suitable for your skin type, whether it’s dry, oily, or sensitive.
Serum: If you have specific skin concerns, such as redness or fine lines, consider applying a serum that targets those issues. Serums are lightweight and penetrate deeply into the skin.
Eye Cream: Apply an eye cream to the delicate skin around your eyes to combat puffiness and reduce the appearance of dark circles.
SPF: If you’re removing makeup during the day, finish your skincare routine with sunscreen. UV protection is crucial to shield your skin from harmful sun rays.
Weekly Exfoliation: To maintain healthy skin, incorporate gentle exfoliation into your routine once a week. This helps remove dead skin cells and keeps your complexion radiant.
Hydrate from Within: Don’t forget to drink plenty of water to keep your skin hydrated from the inside out. A well-hydrated body contributes to glowing skin.
I’m Dr Justin Boey, an Aesthetic Doctor in Singapore. I believe in open sharing of knowledge and skills to patients, blog readers and fellow doctors alike.